Powerlifting for Beginners | How to Get Started (+ Free Program)
So you’ve been thinking about starting the ultimate strength development journey which is powerlifting. Whether you’ve already been lifting for some time or are a complete newbie, this powerlifting for beginners guide will help you get started and making progress faster than you could imagine.
First, we’ll be looking at the basics like goal-setting and technique, and then we’ll get into nutrition, equipment, programming, and competition tips to help you get the most out of your powerlifting journey.
In the end, I will also give you a 4-week powerlifting program.
What is Powerlifting and Why is it Beneficial?
Powerlifting is a sport that involves the execution of three lifts: the squat, bench press, and deadlift. In competition, each athlete has 3 attempts for each lift. Each attempt consists of one repetition, and the highest successful lift in each event is added together to determine an individual’s total.
Powerlifting is beneficial for many reasons, including increasing muscle mass and overall strength, improving bone density, developing mental toughness and discipline, the list goes on. Additionally, powerlifting is a great way to challenge yourself – to set and achieve new personal records (PRs).
With proper nutrition, recovery, lifestyle, and exercise technique, powerlifting can be done throughout one’s lifetime, although at one point you’ll have to accept that your PR days might be behind you.
For example, I happen to know a gentleman who is in his sixties, who can still put up a 700kg (1,540 lbs) total. That shows that in powerlifting, age really is just a number.
Setting Realistic Goals and Expectations for Your Powerlifting Journey
With that being said, does it mean that it will take decades to get “strong”?
It’s cliche to say, but everyone has their own journey. You have to account for all the individual factors that are influencing your training. Both internal and external.
If you’re in your forties, have kids, a full-time job, and a bunch of other responsibilities, your progress will be significantly slower than someone who is in their twenties, doesn’t have as many external stressors, and can dedicate a lot more time to training.
Now if you’ve been actively involved in sports before powerlifting, then you might still progress very fast once you start, even if your conditions aren’t as good.
That brings us to goal setting. I bet all of us have a specific number in mind that we want to achieve. For example, my current most ambitious goal is to hit a 300kg (660lb) deadlift.
The problem with this type of goal setting is that it values the outcome over the process. I’ve been lifting for years at this point so for me this isn’t as big of a problem, but it’s still something I have to be conscious of.
You run into the danger of only getting satisfaction from hitting PRs and lifting heavy. (I’ll cover why this is bad later in this article). Therefore, you might not enjoy training as much. You get impatient. You’ll always want the next PR.
This is why I think the best goal to start off your powerlifting journey is to find a way to fall in love with the process.
Try to improve your technique, find ways to improve your program, and learn new things. This will help you build interest in the process, plus your numbers will go up inevitably.
Find a way to build an identity around your training. Tell yourself that you are a powerlifter. Acknowledge that it takes consistent time and effort to progress once your “newbie gains” have subsided.
I know it can be hard if you’re very competitive and always want to push hard. But remember, you can’t force growth. There’s a reason why they say “consistency is key”.
The Importance of Technique and Exercise Selection
Proper technique is the foundation of being a powerlifter. Not only does it help to prevent injuries, it also ensures that you are being as efficient as possible, allowing you to lift the most amount of weight.
Exercise selection is also crucial for powerlifting beginners. Building a solid foundation will set you up for success in the long run and help improve overall performance.
Now since every individual is different, I’d recommend you seek the help of a certified coach or trainer to ensure that your technique is on point and the best exercises for your body and mechanics are being incorporated.
In the powerlifting world, it’s very common to have a coach provide you with a custom weekly program to ensure that you’re progressing as fast as possible and changing things up whenever life gets in the way. Something that all of the templetized beginner programs lack.
Getting a coach will also help you to progress more safely, and avoid common mistakes that can hinder progress and increase the risk of injury.
Barbell Squat
Here I’ll briefly cover the Squat; whether you should do low-bar or high-bar squats, how to set up, and other useful cues and exercises you can use to help improve your squat.
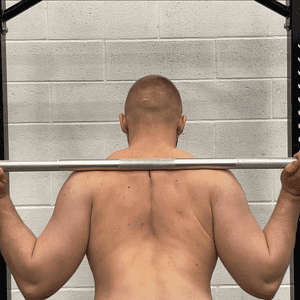
You might have heard or seen that there are essentially 2 ways to squat, in terms of bar placement.
One is where you place the barbell on your traps (trapezius muscle), which is called the high bar. The other one, low bar, is a bit more vague, because any place below the traps is basically considered a low bar.
Both have their perks, so I suggest you play around with both at the beginning, to find out which one you prefer.
I’m not going to cover how to perform the squat because I believe it’s too specific to the individual. It’s hard to give instructions without being aware of the circumstances.
If you want more detailed instructions, you can work with me and get guidance on everything related to powerlifting and strength training.
High Bar Squat
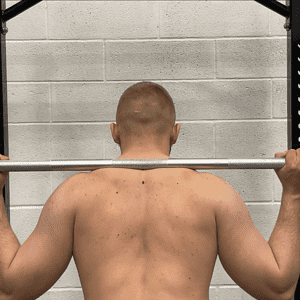
The High Bar squat is the variation you see most weightlifters using. In the high bar squat, the knee flexion is greater than in the low bar squat, meaning that the quads and hamstrings will go through a bigger range of motion.
This places greater emphasis on the quadriceps, rather than the back, making it an useful variation for powerlifters and bodybuilders who want to focus on building more strength and size in that area.
Knowing this, the high bar is probably the preferred option for those with stronger quads relative to their back muscles, but also for those who have relatively short femurs. With shorter femurs, you can reach depth without having to lean forward too much in order to keep the bar in the center of mass. This means less work for the back muscles.
Low Bar Squat
The Low Bar Squat is where you place the barbell on top of the rear delts, rather than the upper traps like in the high bar squat.
The low bar squat is favored by powerlifters because it allows for a better working balance between the quadriceps and the hamstring/glute muscles. It’s also mechanically more efficient for the majority because most people don’t have “very short” femurs.
As the bar sits lower on your back, you have to sit your hips back a bit more and allow your back to go into more flexion than it would in the high bar squat. This is to ensure that the bar stays in line with your mid-foot for most efficient and stable movement.
If you don’t do that, and the bar is over your toes for example, then your quads have to work extra to get the bar back over your mid-foot while your back has to do more work from keeping you from falling over.
Tips and Cues:
- Take videos!
If you’re comfortable with recording yourself in the gym, then do it. Film yourself from different angles, especially from the side, to see whether the bar is in line with your mid-foot or not.
- Learn to brace properly.
One of the best things you can do for your squat and deadlift is to learn how to brace. Because all the force transfers through your mid-section, it’s best to make it as rigid as possible.
Some of the exercises I’d recommend for that are the 90/90 breathing drill and the heels elevated goblet squat. They help you to learn to control and position your pelvis, which is one of the most important things that people get wrong when bracing.
- Don’t flare your elbows!
Flaring your elbows is something that a lot of beginners do because they want to make sure that the bar stays on their back and doesn’t move. This is more common when doing low bar.
It’s suboptimal because it pushes your upper back into flexion, making it harder for you to stay upright. It might also make it harder for you to create and/or maintain a proper brace.
Try to keep your arms as parallel to your body as possible. To make sure that the barbell is still firmly planted on your back, you can flex your wrists, to get your arms closer to your body. Don’t obsess over it though.
- Fixate a point in front of you.
Whether you’re looking higher up or at the floor depends on personal preference, but it’s good to look at a specific point.
This helps you balance yourself better throughout the lift and gives a sort of a reference system to your brain. When you register a point or an image at the top position, and you try to get back to that same position, your body will naturally find the most efficient way to do so.
This concept might be more easily understandable in the context of the bench press.
Barbell Bench Press
Here I’ll briefly cover the Barbell Bench Press; how to choose the best grip width for you, how to set up, and other useful cues and exercises you can use to help improve your bench press.
Again, I’m not going to cover how to perform the bench press because I believe it’s too specific to the individual. It’s hard to give instructions without being aware of the circumstances.
If you want more detailed instructions, you can work with me and get guidance on everything related to powerlifting and strength training.
Grip Width
Although grip width in the bench press is defined rather loosely, most powerlifters categorize it into close grip and wide grip.
Close grip typically involves a greater range of motion and is more triceps-oriented. A wide grip has a shorter range of motion and places more weight on your pecs and shoulders.
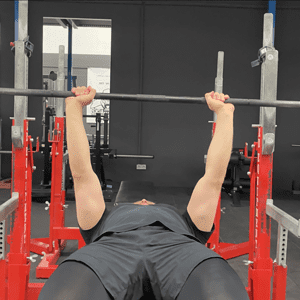
Most powerlifters are stronger with a wide grip, most likely because of the shorter range of motion and the better leverages it allows.
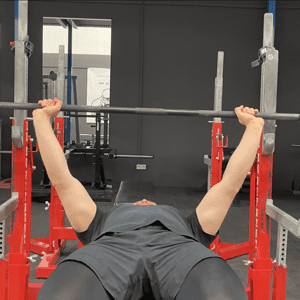
For starters, I’d say don’t worry too much about that. Take a grip width that feels the most comfortable and strongest to you. As you improve your arch, get better at leg drive, and/or gain weight, you might find your preference change.
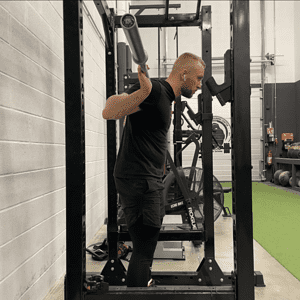
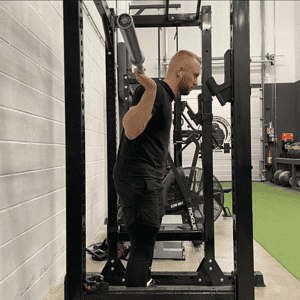
Arching
The things that set powerlifters apart from the average gym-goer are probably the arching of the back and the utilization of leg drive.
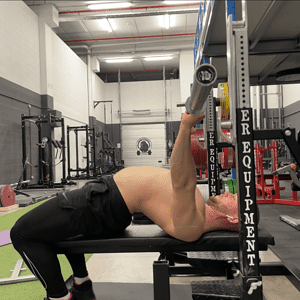
You can see that by arching I can bring my chest way closer to the barbell’s starting position. Arching is done to maximally limit the range of motion the barbell has to travel through, and less ROM equals less work.
The most important thing to keep in mind when it comes to arching is to make sure that you’re not creating an arch in your lower back. The structure of the lumbar spine isn’t meant to tolerate a lot of extension, which is why doing so can cause pain.
The easiest way to practice arching is to use a foam roller, but focusing on maximizing the arch during the bench press is also a great way to improve it.
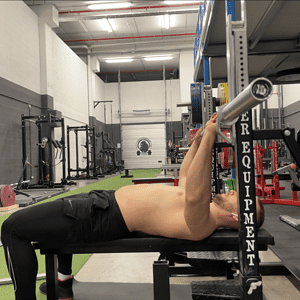
Leg Drive
Now for leg drive, the first thing you have to figure out is your leg positioning. That is also highly individual. Some people like to go very narrow, others wide; some set their legs out in front of the bench, and some tuck their legs under the bench.
Find a position that’s most comfortable for you and allows you to maximally push into the floor. You want to think about pushing yourself up the bench horizontally, not up vertically.
This will help you create tension throughout your whole body, which will make you more rigid and allow for a better surface to press off of.
Tips and Cues:
- Bulldog grip
A bulldog grip is when you internally rotate your shoulders, making the bar sit more directly over your wrist joints. Some lifters might feel stronger in this position, others might find that it’s very hard on their shoulders.
Try it out for yourself, especially if you feel you have strong pecs/shoulders compared to your triceps!
- Fixate a point
As I explained when talking about the squat, the same principle can be utilized on the bench. At the top position, look at where the bar is in relation to the ceiling, and try to get it back to the same spot once you start pressing it off the chest.
Your body should naturally find the most efficient way to do it. This is also a good tip if you’re struggling with bar path consistency.
- Squeeze the bench
When it comes to leg drive, another cue that might be useful is to think about squeezing the bench. This will activate your adductors, creating even more horizontal tension.
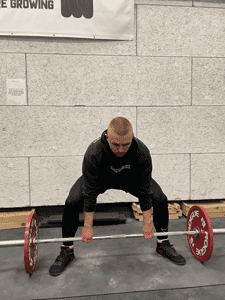
Deadlift
Here I’ll briefly cover the Deadlift; whether you should do sumo or conventional, how to set up, and other useful cues and exercises you can use to help improve your deadlift.
Once again, I’m not going to cover how to perform the deadlift because I believe it’s too specific to the individual. It’s hard to give instructions without being aware of the circumstances.
If you want more specific instructions, you can work with me and get guidance on everything related to powerlifting and strength training.
Conventional
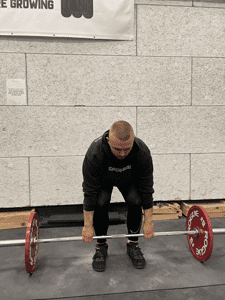
Conventional is probably what most people start with. And it makes sense because it’s technically easier.
Compared to sumo, it places a greater demand on your lower back and a lesser demand on your quads. With conventional, it’s generally easier to get the bar off the floor but harder to lock it out.
Sumo
Compared to conventional, sumo places a greater demand on your quads and your adductors and a lesser demand on your lower back. With sumo, it’s generally harder to get the bar off the floor but easier to lock it out.
You could argue that sumo is mechanically more efficient, but it all depends on a person’s anthropometry, strength, and weaknesses. I suggest you try out both of them and see which one you like more.
Tips and Cues
- Keep the bar mid-foot
When setting up, have the bar across your mid-foot. This will be your center of pressure and where you want to keep your center of mass. The further the bar is from that, the more energy you have to spend to bring it back to the center. It’s just mechanically less efficient to have the bar further or closer to you.
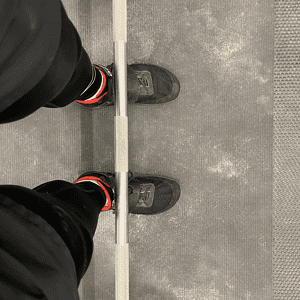
You might get away with not doing that with relatively light weights, but once the going gets heavy, you’ll have to do it. To test this you can, start with the bar over your toes and then move it to mid-foot for the next rep. Use the same weight and notice the difference!
- Don’t pull your shoulders back!
Pulling your shoulders back will only lengthen the range of motion and have you work extra. Chances are that when the weight gets really heavy, they will be pulled down either way.
So, when setting up, let your arms hang as loose as possible. You can think about externally rotating at your elbows to engage your lats (turning elbows towards your body).
Programming: How to Plan and Progress
If you want to make your own program then consider the following:
- Goals: What are your specific goals for powerlifting? This can include increasing your strength, setting personal records, or improving your overall health. Having clear goals will help you to structure your program and focus on the most important aspects.
- Experience: Consider your current experience level with powerlifting, including your experience with the squat, bench press, and deadlift. This will help you to determine what types of exercises and rep ranges are appropriate for your current level.
- Lifestyle: Consider the amount of time and equipment you have available for training. How frequently can you train and how much time do you have in a day to allocate to training? A proper training program should be constructed according to your lifestyle and available resources.
- Strength imbalances: Consider any strength imbalances you may have, and include exercises that target those weaknesses. This will help you to avoid injury and improve overall performance.
- Progress tracking: Keeping track of your progress is important for seeing what is working and what needs to be changed. Consider how you will track your progress, such as by keeping a training journal or using an app.
- Injuries: Prior injuries may limit your ability to perform certain exercises or movements, so it is important to take these into account when creating your powerlifting program and selecting the exercises.
- Progression: Linear periodization is a popular method for structuring a training program. It’s also probably the best method for beginners, as the progress tends to also be linear in the beginning.
It involves gradually increasing the intensity and volume (sets x reps x weight/intensity) of your training over a period of time, with the ultimate goal of peaking for a competition or specific event. Here’s how to use linear periodization when making a training program:
- Define your Timeline: Determine the length of your training cycle. Aim for at least 12-16 weeks. This will be the time period over which you will progress from lower intensity and higher volume to higher intensity and lower volume.
- Plan your Progression: Divide your training cycle into smaller blocks of 4-6 weeks, and plan how you will progressively increase the intensity and lower the volume of your training over that time.
You’ll want to start with moderate volume, increase it over the first block, and once you start increasing intensity, slowly cut back on volume.
For example, in the first block start with lighter weights (60-70%) and do them for higher reps, and in the final block use heavier weights (85-100%) and perform fewer reps.
- Include deload weeks: A deload week is a planned reduction in volume and intensity, designed to allow your body to recover and prevent burnout. Plan to include a deload week every 4-6 weeks.
- Adapt: It’s important to be able to adapt as needed. If you are not making progress or if you feel overwhelmed, adjust your program.
As with progress, learning to create the most efficient program takes time. You have to test and experiment. See how your body responds to certain stimuli.
It is important to remember that everyone is different, and what works for one person may not work for another. It will take some trial and error to find the best powerlifting program for you.
Common Mistakes and How to Avoid Them
In this section, I want to bring out a couple of points that I think are the most detrimental to your progress.
Going heavy all the time
This is what I was talking about earlier in the goals section.
The biggest downside to lifting heavy all the time is that it increases the risk of injury. This is especially true if your technique isn’t as polished. You have to realize that your body can only take so much.
If you constantly hit lifts above 90% of your 1RM, you might develop tendonitis or overuse injury.
It is important to remember that powerlifting is a sport of progressive overload, but you can’t progress if you don’t allow your body to recover.
In addition to heavy lifting, it is important to incorporate lighter, higher-rep sets, as well as assistance exercises to promote overall fitness, build more muscle, and improve work capacity.
An example of this would be the overhead press or the pullups. Both are non-specific to powerlifting, but great compound exercises to target large amounts of muscle mass and build general strength.
Going off program
This is true, whether you’re designing your own program or having a coach do it for you.
Yes, going off program can be justified at the moment, but it probably won’t be good in the long term. A good program should build you up to your peak form over the course of many months.
You can’t be at your strongest all the time, the sooner you learn that the better. My numbers look way different when I’m close to a competition vs when I’m in the “off-season”.
Now the reason why it’s unfavorable is that:
- It’s hard to time your peak
- You or your coach won’t know how the program is affecting you
If your program is laid out to have you in your best shape for a specific event, and you don’t follow the program, then don’t blame the program.
One example of this is people leaving their best lifts in the gym. They get so excited and feel so good in training when they’re close to a competition, that they smash a new PR in the gym.
If this wasn’t intended in your program, then chances are that you might perform worse on the day of the competition than you did that day in the gym.
Another situation is where a person has a coach, goes off-program, and doesn’t tell the coach that they did. Then the same scenario repeats itself, as described above, and the coach is left wondering what happened.
If you decide to work with a coach, have some trust in them. Trust their abilities and trust the process.
If it Hurts, Don’t Push it
This might be a no-brainer for some of you, but for the more competitive people, this can be a challenge.
A physiotherapist who I once worked with had a perfect saying to illustrate this point:
“If you’re not getting paid, don’t hurt yourself.”
Now, this is not to say that you should always push through the pain if you’re a professional athlete. But you get the point.
As I said in the goals section, it’s important to enjoy the process. It’s damn hard to do that if you’re constantly in pain.
Most people start powerlifting because they want to get stronger and/or improve their overall health. Seems contradictory to hurt yourself when that’s the goal.
Now if you’re a competitive powerlifter, you might want to consider pushing through pain when you’re close to a competition.
You’ll have to weigh the pros and the cons yourself, as every person is in a unique situation, so I’d rather stay away from giving any specific guidelines. If you have a coach, talk it through with them.
Competing: How to Prepare and What to Expect
Now for the fun part. You’re looking at signing up for a competition and want to know how to go into it.
Here’s what to consider when preparing for a powerlifting competition:
- Train consistently: Focus on gradually building your strength and perfecting your technique in the months leading up to the competition. Aim to train consistently and have some sort of a peak in your program.
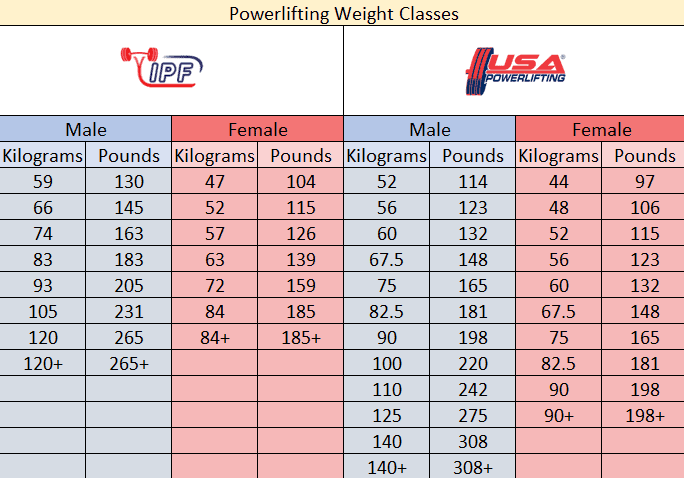
- Know the rules: Make sure you are familiar with the rules of the competition you will be participating in. This can include making sure to stay in your selected weight class, judging criteria, and allowed equipment.
- Plan your strategy: Determine your opening attempts for each lift based on your training results, and plan your strategy for each lift accordingly.
- Eat and hydrate properly: Leading up to the competition, make sure you are eating enough, and try to be mindful of your meal choices.
On the competition day, don’t eat foods you’ve never eaten and drink some isotonic drink that contains electrolytes. It might also be useful to take half a teaspoon of salt.
- Get enough rest: Make sure to get plenty of rest in the days leading up to the competition. This will help you feel well-rested and refreshed on competition day.
- Visualize: On the days or even weeks leading up to the competition, imagine yourself performing each of the lifts in vivid detail. Although more significant for sports requiring fine motor skills, imagery or visualization can also be beneficial for strength sports.
Expect to experience a mixture of nerves and excitement on competition day. Be prepared to compete against others, but also remember to have fun, enjoy the experience and win the competition against yourself.
By preparing properly and staying focused, you‘re sure to have a successful and enjoyable competition experience.
Nutrition, Recovery, and Supplements
Here are some extras to consider, that could help you along your journey.
Protein
Protein is essential for repairing and building muscle tissue and is therefore an important component of a powerlifting training program.
I’d recommend consuming at least 0.75 grams of protein per pound of body weight each day. This number is just a general starting point. You’ll have to figure out how much works best for you. Going higher won’t do you any harm, but going lower might impede your recovery.
Sleep
Getting adequate sleep is crucial for recovery and growth. Aim to get 8-9 hours of sleep each night to ensure that your body has enough time to recover from your training sessions.
The more intense the training, the more sleep I’d recommend.
Being active
In addition to your strength training program, it is important to engage in regular physical activity to improve your overall health and well-being. This can be some cardio work, stretching, or just walking and getting your daily steps in.
A lot of powerlifters don’t like cardio. And it makes sense because powerlifting is probably the most anaerobic sport there is, which is likely why people who hate endurance activities end up in powerlifting.
The problem with this is that many powerlifters are willfully blind to the benefits of cardio or just being active for that matter. This makes them believe that they don’t need to be active outside the gym because lifting weights is enough. I have to admit, that was me at one point.
The truth is, that staying active has several health benefits and ways in which it can be beneficial for strength training as well.
For example, a higher step count is associated with a lower risk of premature death and cardiovascular events, such as a stroke. I’m sure that those are things we would all like to prevent from happening.
As for performance, there are two things I’d like to point out. Firstly, moving around is good for getting your blood flowing and lubricating your joints.
Consider this, you’re a heavier individual and have a sedentary job. All that compression on your hips will accumulate over the course of the day/week/month. If your posture isn’t great, then the same applies to your back.
The result might be nerve pain, tight muscles, or a loss in range of motion (ROM), which could hinder your performance in the gym.
By being active you can prevent these issues. And it’s not as much work as you might think. For example, for me, the bare minimum is 5000 steps/day. Once I fall below that, I start seeing problems.
The second reason is that it makes you more resilient. Let’s say you do 5000 steps every day. Then life happens, and for whatever reason, you have to do 10,000 or more that day or even that week.
You would be far better off if you’ve accustomed yourself to 5000 than 2000 for example. After doing 10,000 a day you’d be less fatigued, meaning it wouldn’t have as much of a negative effect on your training session(s). It might even be the opposite.
And of course, being more active while keeping the caloric intake the same will also mean that you’re likely to lose fat.
Consider the arguments that I’ve listed for why being active is good and try to at least do the minimum to prevent the consequences of being idle.
Creatine
Creatine is one of the most popular and researched supplements on the planet. It has been shown to increase maximal strength as well as aid in building muscle mass.
I think everyone should take creatine, since it’s very cheap, and accessible, and there hasn’t been any research showing any dangers of creatine supplementation on one’s health, even in the long term.
There’s really not much else to say about creatine, but if you’re new to this supplement, keep these 2 things in mind.
- Only buy (Micronized) Creatine Monohydrate. Anything else is designed to make you pay more without receiving any additional benefits.
- When you start taking creatine, do a loading phase. This is just to have the effects take place sooner.
Pre-workouts
Pre-workout supplements are a must for many gym-goers. They can help improve perceived energy levels, focus, endurance, and even strength.
The main driver of these supplements is of course caffeine, which has been shown to be most effective for high-intensity exercise when taken in moderate amounts (3-6g/kg BW).
Finding the best pre workout for oneself can depend on many factors such as taste, price, the ingredient profile, and your sports discipline.
Smelling salts
Another “tool” that is popular in the powerlifting and strongman community is smelling salts.
They can be used to psych yourself up and get ready for a big lift. Although there isn’t any research showing the physiological benefits of smelling salts, one could argue that their benefit comes from the mental effect.
Inhaling ammonia gas will send your body into a brief shock, which will most likely make your head clear of any thoughts. This could be beneficial for some, but you won’t really know if you’re one of them unless you try it out.
Everything else
I know there’s a tendency to look for new and interesting things that can help us improve our performance or recovery. The truth is, making sure that you cover the basics will be more beneficial than any supplement or tool.
Getting enough protein through your diet makes BCAA supplements useless. Getting enough quality sleep is better than chronic caffeine supplementation or massage guns.
Equipment
Here I’ll list all the important equipment you would need for powerlifting, whether it’s raw or equipped, and give you what I think are the best picks.
Footwear
Many types of footwear can be used for powerlifting and everyone has their own preference. I’d categorize them into 3 main groups. The products in the brackets are the ones that I personally use.
Squat shoes (Adipower 3)
Flat sole shoes (Sabo Deadlift Pros)
Slip-on shoes (Notorious Lifts)
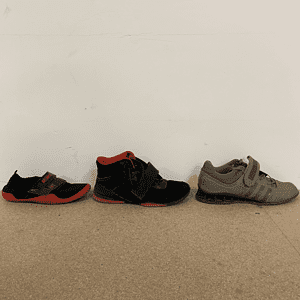
You can get by with one, but you can also use a different pair for each lift. Just don’t use squat shoes for deadlifts, the heightened heel makes it harder for you to keep your balance and use your posterior chain to its fullest potential. It also lengthens the range of motion.
*There’s no differentiation between footwear in equipped vs raw powerlifting.
Knee Sleeves and Knee Wraps
Knee sleeves are a must for any powerlifter as they help to keep the knee joint warm and more stable, and if they’re tight enough, improve your knee extension capabilities. It is also worth mentioning that elbow sleeves are not allowed in powerlifting competitions.
They are mainly used on squats, although some people like to use them when deadlifting as well. I’d argue that they don’t provide much benefit on deadlifts and might even compromise your position, but they’re allowed in the IPF, so do what you like.
In my opinion, the two best knee sleeves are the SBD knee sleeves, and the INZER knee sleeves. They are both approved by the IPF. I’d say the SBD is the best pick for most people.
INZER knee sleeves are very tough and tight, which may allow you to gain an edge on your competition, but because of that, they are not the most comfortable for everyday training.
Knee wraps are important for anyone looking to compete in equipped powerlifting. They have to be wrapped around the knees, therefore allowing for more compression and support than knee sleeves.
Most equipped lifters have a handler who helps them put them on. The key thing is to not put them on so tight that it restricts blood flow, as that can be detrimental to your squat.
Singlet
A singlet is a must if you want to compete in powerlifting. They are essentially the “dress code” and they make it easier for the judges to see the outlines of your body. This is good because it leaves less room for doubt. For example, it’s easier to tell whether someone’s butt came off the bench or not if they are wearing a singlet vs some baggy pants.
In equipped powerlifting, there are multiple types of singlets. You have single-ply, which means that the suit is made from one layer of fabric, and multi-ply, which means that there are 2 or more layers.
All equipped powerlifting competitions also specify what they allow. Single-ply is the more common type, while multi-ply is for the really hardcore lifters who are determined to lift as heavy weights as humanly possible.
Belt
A good lifting belt is probably one of the most beneficial pieces of equipment you could own. It allows you to create huge amounts of intra-abdominal pressure, therefore allowing you to brace better.
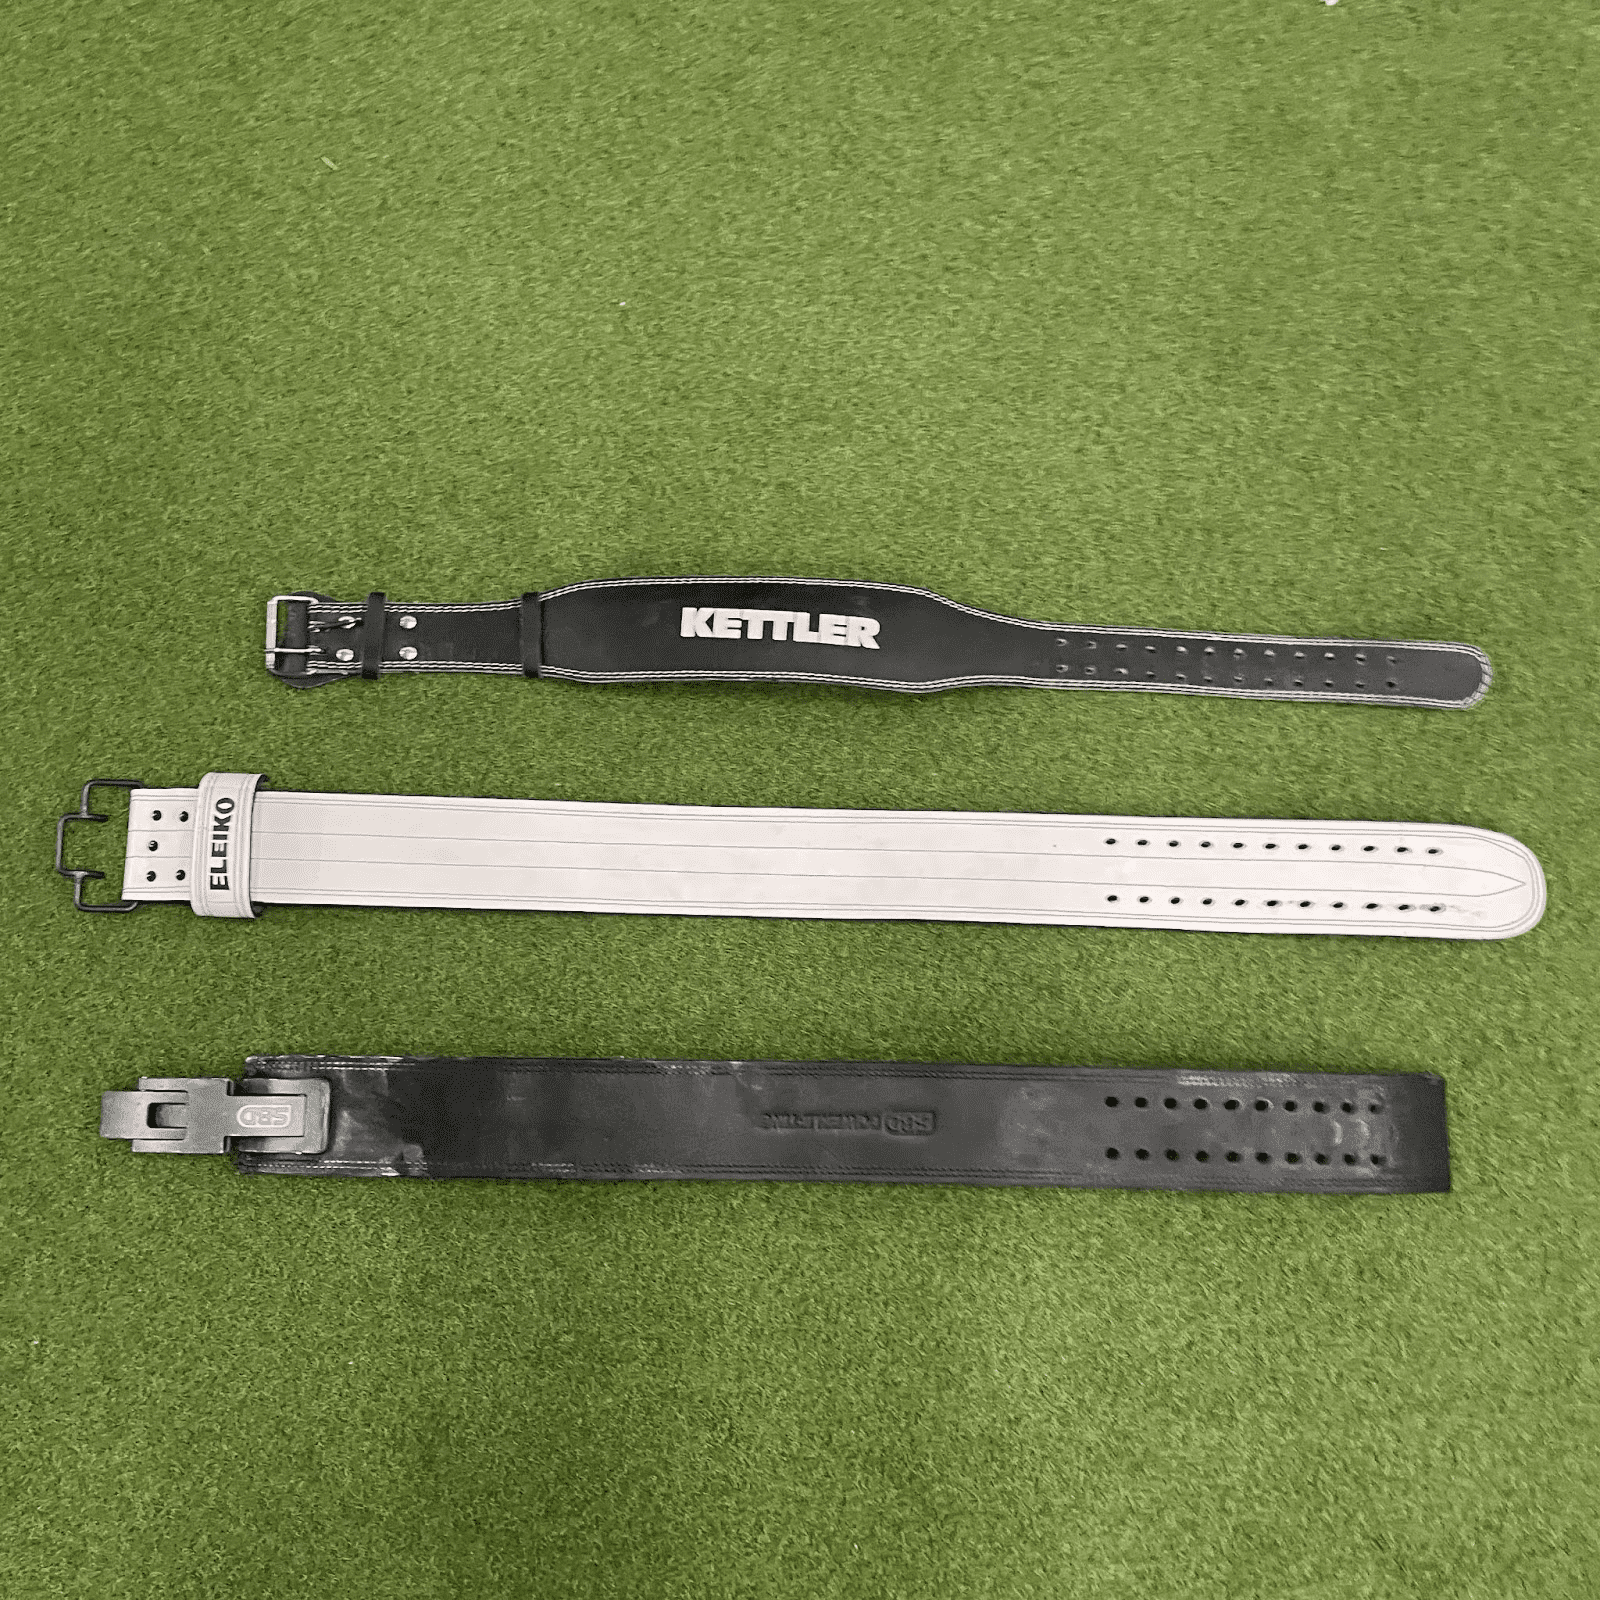
When looking for a belt (if you want to compete), make sure that it meets the requirements of the federation you want to compete.
In my opinion, the best belt is the SBD lever belt, with the A7 lever belt being the runner-up. Both are very expensive, but they are definitely a worthy investment.
*There’s no differentiation between belts in equipped vs raw powerlifting.
Wrist Wraps
Wrist wraps are a piece of equipment that is probably the least important. A lot of elite lifters go without them. If you’re not prone to any wrist injuries, then chances are you don’t really need them, although they can still be beneficial.
Their main benefit is that they give you a sense of security and stability when lifting heavy weights. On squats, they can also be of great help if you’re bending your wrists a lot. Then the wrist wraps will help to take away some of the stress placed on the wrist joints.
It’s a bit silly at this point, but again, the best in my opinion are the SBD wrist wraps. The quality-to-price ratio is excellent, and they are very durable.
*There’s no differentiation between wrist wraps in equipped vs raw powerlifting.
Beginner Powerlifting Program
I’ve put together a short program that is perfect for a novice lifter. Most powerlifting programs I’ve seen lack depth and understanding of the training process as a whole. They only focus on competition lifts and leave out all the accessory stuff that contributes to overall training volume.
I wanted to create something that anyone can pick up and use to build a good foundation.
Wrap Up
It’s been quite the ride, touching on different bits and pieces here and there, but I hope you learned something from this powerlifting for beginners guide and can now apply this newfound knowledge to your own training.
Whether you’re going for the biggest one-rep max or chasing muscle growth, powerlifting is great for both. Once you get going, it’s hard to stop, because the progress is very evident, and lifting heavy-ass weights is also fun.
Try to focus on the basics like your diet, recovery, technique, and staying consistent. That way you’ll be hitting PRs sooner than you think. Good luck!
Please consider sharing this article if you found it helpful!